

However, after my post on taking more photos of your kids, a lot of you have asked for my advice on how to take better pictures of your little ones. While I'm completely flattered, I also don't really feel qualified to teach you guys anything about photography since I'm still learning. I don't know what I'm doing half the time and I certainly can't tell you what you should be doing. That being said, I'm going to do it anyway!
So, here's the second installment of Going Beyond Point and Click - 8 easy ways to improve your photography, written by someone who has absolutely no training and zero credentials...ME! Since I'm not a "real" photographer (total fauxtographer here), my advice is going to be on a much more basic level. Some of these are the exact same things that Anni discussed, but from my (amateur and kid-photography-based) perspective. It'll cover some of the stuff I've found helpful and learned about photography over the last couple years. Consider it the prequel to Anni's post describing some of the things that I do when I take photos (in case you care). Maybe these things will help you, or maybe you're way beyond this stuff. Feel free to leave a "Duh, Sara" comment below. Or leave your questions - I might not know the answer, but I'll try to help :)
1. Learn the 3 basic settings: aperture, shutter speed, ISO
The very first thing I did when I got my "fancy camera" was to learn the basics and then practice, practice, practice. And the most basic of the basic camera functions/settings are aperture, shutter speed and ISO. There are a ton of tutorials out there that teach you what all of these are/do, so try a few out. Here's how I remember them:


The very first thing I did when I got my "fancy camera" was to learn the basics and then practice, practice, practice. And the most basic of the basic camera functions/settings are aperture, shutter speed and ISO. There are a ton of tutorials out there that teach you what all of these are/do, so try a few out. Here's how I remember them:
- Aperture (or f/stop) - this determines how much of your photograph is in focus. The f/stop numbers refer to how open or closed the aperture on the lens is. The wider the opening of the lens (or the smaller the number), the greater the amount of light that enters your camera at one time (and the less will be in focus). Remember, the SMALLER the number, the LESS is in focus. A wide open aperture (LOW number) is how you get the blurry background in a photo (bokeh). Aha moment!

(source)
- Shutter Speed - is how quickly the shutter opens and closes. A faster shutter speed will freeze action whereas a slower shutter speed can create a blurred effect. When you set your shutter speed on your camera, you’ll see numbers like 60, 120, 250, 1000 and so on. These actually represent 1/60th of a second, 1/120th of a second and so on. So the HIGHER the bottom number on the fraction, the FASTER the shutter speed and the less blurry it will be.

(source)
- ISO - is the film speed, or how quickly the camera captures the photo. Upping the ISO will bring light into your photos in lower light settings. But the higher you set the ISO, the more digital noise (or grain) is created in the image. A good rule of thumb is that anything 800 or over will begin to give you digital noise in your image.

Now that you know the basics, play around with your camera and adjust them and see how it changes your photos. When I was learning how to use my camera, I spent hours just taking pictures of random things around my house and my yard with various settings. Start by putting your camera on Av (aperture priority mode) and take 20 photos of exactly the same thing with various aperture settings, starting at the lowest one and going up from there. Keep your focal point the same and check out the background. You'll be amazed at the difference. Then put the camera in Tv (shutter speed priority mode) and take 20 photos of the exact same thing (something moving, like running water or a wheel spinning or your child running around the yard like a wild banshee) with various shutter speed settings. With both, adjust your ISO to brighten the photos up, but not enough to where they're grainy. Play around! Take 500 photos and then delete them all. That's the great thing about a digital camera. After this, you'll get it.
2. Buy a prime lens
This was also one of Anni's tips, but I want to re-stress the importance of this. If you really want to up your game and take beautiful, bright photos with that dreamy blurry background, you'e going to need a good lens. For those of us that aren't professionals, a good lens is probably more important than a super fancy camera body. So, what I'm saying is whatever DSLR you have is good enough, if you spend a little extra money on a good lens. Why? Because a good prime (as opposed to zoom) lens will have a much wider aperture (remember from 2 seconds ago, the wide aperture (low f/stop) is what lets in light and creates that shallow depth of field). That cheap "kit" lens that came with your camera probably only has an aperture of f/5.6 or something. You can get a very good prime lens (50mm f/1.8) for just over $100. f/1.8! That's WAY wider than f/5.6, which means it's going to really brighten up your indoor photos and help you achieve that beautiful blurry background (bokeh) you're after. Even a good zoom lens will only go down to f/2 or so. My 50mm goes down to f/1.4


(shutter speed: 1/3200 sec, aperture: f/1.4, ISO 125)
3. Zoom with your feet
Nearly everyone I suggest getting a prime lens to comes back with the same response, "But I want a zoom lens, so I can get close to or far from my subject without moving." Well, sorry, you're just going to have to stop being lazy and move! It'll be worth it, I promise! Moving around (and zooming with your feet, instead of your lens) makes you interact more with your subject (and for those of us photographing kids, this is so important). It forces you to pay more attention to composition. It makes you consider light and setting more frequently. These are all good things, my friend.


Now this is definitely a style preference, but when I'm taking pictures of people (or mainly just Mac), I like to shoot my subject(s) very close. Sometimes background and other elements are in the photo, but I really like the people in my photos to be the center of attention in the photo and for the viewer not to be distracted by what's around them. I recently read an article that mirrors this style that I loved and thought was really spot-on with respect to how I like to take photos. Here's an except:
"When I first became a photographer, I realized that many of my photographs were wider shots. I liked adding elements of the environment to tell the story, but I was lacking a sense of intimacy in my images. My subjects were getting lost. I then discovered my love for prime lenses. Prime lenses have a fixed focal length and do not zoom in or out. You become the zoom. If you want to get closer to your subjects, you are forced to step closer — and, in turn, interact with them. When you interact with your subjects, you can capture more emotions.
Whenever possible, I always zoom with my feet rather than my lens (the 50mm f/1.2). With this lens, I am able to get close to my subjects without getting any distortion from a wider lens. Shooting close also eliminates distractions from your image. Sometimes adding in natural elements to the image can be a good thing, but there are times when you want to focus solely on your subject. Filling the entire frame with your subject lets new details come into play, and it leaves no doubt about the intended subject of the photograph."
(you can read the full article HERE)

Of course this isn't for everyone and it's definitely not appropriate in every situation (like on vacation taking photos of landscapes, or when you want to set the scene of a photo, or for those of you that love using negative space).
4. The eyes are key
I cannot stress this enough! The EYES of the subjects in your pictures MUST BE IN FOCUS. Let me say it again. EYES.IN.FOCUS. Capisce? I can't even tell you how many photos I delete because the eyes of my subject were not in focus. This is a tough one for me because Mac moves a lot and it's not always easy to make sure that the camera is focusing on his eyes. Plus, when you're using a wide aperture, it's really easy for your camera to focus on what's closest to you, rather than the eyes. I've probably taken thousands of photos of Mac where his hand (or nose, or foot, or something else) is in focus, but not his eyes because that was what my camera chose to focus on. That's why back-button focusing can be really helpful - you get to choose the focus spot, not the camera. If I don't have time to set the focus manually, I try to take a series of photos quickly in a row with the hopes that at least 1 has the eyes in focus and then I just delete the rest.

And just as important as you taking photos with the eyes in focus, you should also make this a priority (an absolute MUST) when choosing a photographer to take your photos. I also cannot tell you how many times I've seen "professional" photographers post photos where the subject's eyes were not in focus. Oh, the horror! It's one thing when someone like me (not a pro, just taking pictures of my kid) posts those photos (because I do occasionally), but it's quite another when someone paid for those photos to be taken and a professional doesn't nail the focus. I feel so bad for the person getting those pictures. Sometimes the consumer might not even realize it - I think with time you develop an eye for that type of thing after looking at lots of photos. But once you see it, you can't UNSEE it. Start paying attention and you'll start to notice it more and more.


And just as important as you taking photos with the eyes in focus, you should also make this a priority (an absolute MUST) when choosing a photographer to take your photos. I also cannot tell you how many times I've seen "professional" photographers post photos where the subject's eyes were not in focus. Oh, the horror! It's one thing when someone like me (not a pro, just taking pictures of my kid) posts those photos (because I do occasionally), but it's quite another when someone paid for those photos to be taken and a professional doesn't nail the focus. I feel so bad for the person getting those pictures. Sometimes the consumer might not even realize it - I think with time you develop an eye for that type of thing after looking at lots of photos. But once you see it, you can't UNSEE it. Start paying attention and you'll start to notice it more and more.

5. Pick your best
Anni said this was her most important tip and I have to agree with just how important it. While some of these tips will help you learn how to take better photos, this tip is telling you to only keep the good ones that you do take. Why keep tons of photos of nearly the exact same thing, especially if only a few of them are in focus or perfectly exposed? Cull, cull, cull. Only present your best. No one has to know that you took 437 photos of your kid playing with the hose, then deleted 200 of them because they were slightly out of focus, deleted another 100 because your settings weren't perfect, and deleted another 100 that were too similar to another photo that was better framed or in better focus, leaving you with only 37 photos that are in focus, perfectly exposed, that you love. And 37 photos is still a shit-ton of photos of your kid playing with the stupid hose. Serious overkill (I am SO guilty of this). For the baby book or for posterity, you only really need about 5, right? Maybe only 2. THIRTY SEVEN is a bit much. I'm working on this all the time.

Ok, so all that stuff about the eyes being in focus and deleting every single photo that's not perfect is important, BUT, if you take a photo that tugs at your heartstrings and brings you to tears and is just wonderful, but it's not perfectly in focus or correctly exposed, just keep it. Don't stress about it. Maybe it's not the one you proudly display on a 20x30 canvas in your living room, but there's nothing wrong with keeping photos that you love, whether they're perfect or not. I have a lot of these. I like to call them "artistic." :) It's ok, you can call them what they really are...blurry.
Anni said this was her most important tip and I have to agree with just how important it. While some of these tips will help you learn how to take better photos, this tip is telling you to only keep the good ones that you do take. Why keep tons of photos of nearly the exact same thing, especially if only a few of them are in focus or perfectly exposed? Cull, cull, cull. Only present your best. No one has to know that you took 437 photos of your kid playing with the hose, then deleted 200 of them because they were slightly out of focus, deleted another 100 because your settings weren't perfect, and deleted another 100 that were too similar to another photo that was better framed or in better focus, leaving you with only 37 photos that are in focus, perfectly exposed, that you love. And 37 photos is still a shit-ton of photos of your kid playing with the stupid hose. Serious overkill (I am SO guilty of this). For the baby book or for posterity, you only really need about 5, right? Maybe only 2. THIRTY SEVEN is a bit much. I'm working on this all the time.

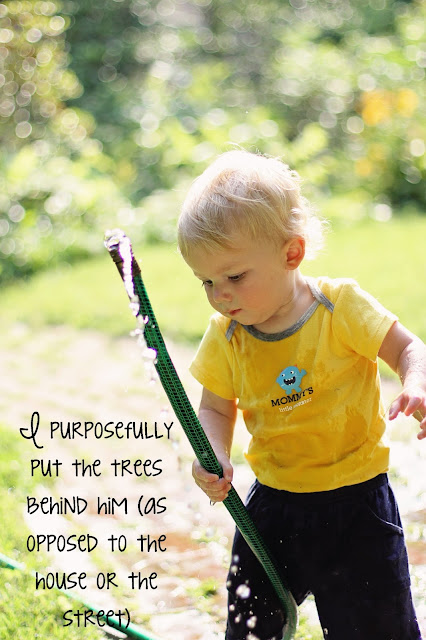
(Here are 4 of about 10 of nearly the EXACT same shot - I have to learn to only pick 1!)
(In case you're wondering, I'd probably pick the top left because his eyelashes stand out so much more.)
6. Be the director of your photos
You know how in moving-making (because I'm oh-so familiar with that...what?) the director is the one who tells people where to stand or how to act or what to do? Do that! If you don't like the background you're getting in your photos, move around to the other side or have your subjects stand somewhere else. If it's too dark where you're currently taking pictures, move towards a window. If the light is too harsh, find some shade. If your living room is a disaster area, take the baby to another room. Or better yet, do a quick 30 second clean up to remove the clutter from an area and then take the photos (it doesn't take much to create the illusion of a clean house if you remove the clutter and distractions from the photos - no one will know you just shoved all that shit under the bed!). Don't be afraid to take charge of your photos. Move the baby, he won't care. Of course this won't always work or be practicable, but you might be surprised how much little things like this could improve your photos.

7. Experiment with angles
This is such a generic tip, but great when you're photographing kids. Get down on their level. Get close to them. Get way up above them. Shoot them from the side or from the back or from way below. Lay on the floor. Climb on a chair. Shoot through a fence or from behind something. Play around. If your kid's like mine, he basically ignores me if I'm just standing next to him. But if I lay down on my back and look up at him or stand on the table and make monkey noises, he pays attention! And that's when I can get a good shot of him actually looking at me, which happens less and less often. Plus, playing around with different angles can create some really visually interesting shots and give you a new perspective. I already know what it looks like from where I'm standing, why not try something else.


8. Basic editing
Again, like Anni, I think it can really help you improve your photos if you do some simple basic editing to them. You don't need to go out and buy full-on Photoshop for hundreds of dollars, but do use something a little more sophisticated than Instagam filters. I use Photoshop Elements (which you can get for less than $100). I've also heard really great things about Lightroom (but know nothing about that). I think Elements is pretty easy to use and offers WAY more things than I'll ever be able to teach myself. I started out just using actions and have taught myself some basic editing from there. Actions allow you to make quick edits with one click (i.e. brighten, make warmer, convert to black & white, add contrast, etc.) As for my favorite actions, the Pioneer Woman has a great set of free actions and Florabella has some really stunning ones, but they're a little pricier. I absolutely love the Florabella Colorplay actions (and she's got great online tutorials to show you how to install the actions and use them). They're really simple to use. I've never taken an editing class or anything (although I'd love to) - but there are tons of free editing tutorials out there to teach you the basics. My main edits are usually to lighten a photo, add a little extra contrast and sometimes fix color casts (too yellow or blue because of indoor lighting).

So, that's my two cents on how I take photos. I hope it encourages you to pick up your "nice camera" and take some photos! Play around...experiment. Go crazy, folks! Like I said, I'm not a professional, nor do I think my photos are outstanding or anything, but I do think I've learned a lot over the last few years and have come a long way from where I started. I'm happy to answer any questions you might have. And if this series is something you like, let me know and I'll try to find a few more people to share their photography tips/advice.
This is such a generic tip, but great when you're photographing kids. Get down on their level. Get close to them. Get way up above them. Shoot them from the side or from the back or from way below. Lay on the floor. Climb on a chair. Shoot through a fence or from behind something. Play around. If your kid's like mine, he basically ignores me if I'm just standing next to him. But if I lay down on my back and look up at him or stand on the table and make monkey noises, he pays attention! And that's when I can get a good shot of him actually looking at me, which happens less and less often. Plus, playing around with different angles can create some really visually interesting shots and give you a new perspective. I already know what it looks like from where I'm standing, why not try something else.


Again, like Anni, I think it can really help you improve your photos if you do some simple basic editing to them. You don't need to go out and buy full-on Photoshop for hundreds of dollars, but do use something a little more sophisticated than Instagam filters. I use Photoshop Elements

So, that's my two cents on how I take photos. I hope it encourages you to pick up your "nice camera" and take some photos! Play around...experiment. Go crazy, folks! Like I said, I'm not a professional, nor do I think my photos are outstanding or anything, but I do think I've learned a lot over the last few years and have come a long way from where I started. I'm happy to answer any questions you might have. And if this series is something you like, let me know and I'll try to find a few more people to share their photography tips/advice.

Great tips Sara! I definitely agree with all of them - and YES to the one about focusing on the eyes! It's so frustrating when people post photo after photo that's out of focus.
ReplyDeleteThis is so very helpful. Thank you for posting! I didn't know most of this stuff, despite having a DSLR and going to a 1 hr class on it. Now the f/stop stuff makes sense!! I honestly don't even know what type of lens my camera came with so I need to figure that out. And my house is uber dark, yet that's where I end up taking most of my pics. I need to start lugging my camera with me outdoors more.
ReplyDeletewow...this is amazing, and I'm honestly a little embarrassed of the photos I snapped from VBS last week--the lighting was horrible inside the church which made for some less than stellar photos...but at least I have them, and now I have a LOT of practicing to do with all of your suggestions!
ReplyDeleteThis is such a great and helpful post Sara!!
ReplyDeleteThis is an awesome post, thanks for sharing! I just took an editing class last week (it was 6 hours) it was intense and awesome, but now I just need to put it to work! I really need to purchase Florabella's Colorplay actions but just haven't bit the bullet yet. The photographer who taught the class said those were some of her favorites too!
ReplyDeleteTHANK YOU THANK YOU THANK YOU! I LOVE your pictures of Mr. Mac, and I love how his eyelashes and eyes are always aglow in the photos. I'm excited to play with my camera now - and really try to understand the basics a little better.
ReplyDeleteThis is really awesome stuff, Sara. Thanks so much for putting it together.
ReplyDeleteAwesome tips my friend!! :)
ReplyDeleteThis is so great! I get overwhelmed when I look at tutorials on how to use my camera, but I feel like this one is more my style! Thanks for breaking it down for me :) Now I need to put these things into practice so I can get off the basic settings!
ReplyDeleteGreat post! So helpful!
ReplyDeleteLoved this post Sara!! I am leaving how to shoot in manual and found your tips so helpful! I have the problem with getting my little guys eyes in focus too, what do you mean by back button focusing? Was that totally obvious and I missed it, it's bedtime haha! I so need to be better about deleting not great pics, my guy is 11 months and I am SO overwhelmed by the amount of pics I have, most of them aren't great. I love by 50mm prime lens, it makes such a difference. Thanks again for this post, xo!
ReplyDeleteThese are great! You're super woman by the way. I have a 50mm lens and I have GOT to get that thing on my camera. I end up getting some blurry images and then I'm so chicken that the ONE shot where they're smiling is going to be blurry so I just end up using the boring old kit lens on automatic. I have got to start experimenting. :)
ReplyDeleteThank you so much for these suggestions! I think I need to take my big girl camera out and just start practicing. I like the suggestion of taking the same picture with various changes, so you can really see what those changes do to the picture.
ReplyDeleteThis is such a great post! So many great tips! Thanks for posting :-)
ReplyDeleteWow - thanks for sharing! Adding to my photography tips board on Pinterest! <3
ReplyDeleteVery interesting post. You certainly know a lot about photography and this will be very useful for many people!
ReplyDeleteGood lord, that's a lot of helpful info! For someone who's not a photographer, you know so much! I'm definitely going to try some of these out...
ReplyDeleteBookmarking this. I so need it!
ReplyDeleteVery helpful. With 2 grandbabies to make memories with and a fantastic camera, I now will capture those memories to near perfection. thanks...
ReplyDeleteThank you so much for this detailed info. It's exactly what I need, in terms I can understand! And I love the graphics to accompany the descriptions of the basic settings. Visual learner, here. Anyhow, you inspired me to buy a new lens for Mother's Day, and so far I've been very pleased with the pictures. Granted, I've only played around with it in the nice sunny weather, which always makes for good photos, but I just know this will help make the difference I was looking for. It's all about the aperture! And FYI, I'm posting some new pics of my Bean on my blog and crediting you with inspiring my purchase. So thanks!
ReplyDeleteThis is exactly the information I have been looking for! I have been on the fence on speaking the money on a "fancy camera@ or just keep paying for professionals, but I want to be able to take them on the fly. I feel a little but more confident that I can do it now and get the results I'm hoping for. Thanks for making this post!
ReplyDelete